DX100
Manual:
Bonus Literature:
DX100 patches
| DX27-100_Presets.zip | (9.2kb) | The original DX27, DX27S and DX100 factory voices. Banks contain 24 voices each. | |
| DX27-100_A-Z.zip | (70kb) | 33 banks named aa.syx through z.syx, designed for the DX27 & DX100, each bank contains 24 voices. Some voices re-occur from bank list to bank list. | |
| DX27-100_20_Banks.zip | (28kb) | 20 banks named 1.syx through 20.syx, designed for the DX27 & DX100, each bank contains 24 voices. Some voices re-occur from bank list to bank list. | |
| DX27-100_BC.zip | (3.2kb) | 1 custom bank of 24 voices. A lot of pleasantly unexpected 'breath control' voices in this group. | |
| DX27-100-3_Banks.zip | (4.0kb) | 3 custom banks named "Percussion Effects", "Pianos Organs Basses", and "Strings Keys Basses", designed for the DX27 & DX100, each bank contains 24 voices. Some voices re-occur from bank list to bank list. | |
Detailed Specs:
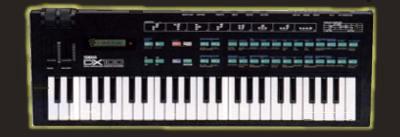
YAMAHA DX100 |
|
| Keyboard | 49 mini keys |
| Sound Source | FM Tone Generator (4 operators, 8 algorithms) |
| Polyphony | 8 notes, reverse priority |
| Internal Memory | 24 voice INTERNAL memory (read/write) 192 voice PRESET memory (read only) 96 voice number bank (alterable) |
| Effects | PITCH BEND, MODULATION, PORTAMENTO, SUSTAIN, KEY VELOCITY (reception only) |
| Controls | PITCH BEND WHEEL, MODULATION WHEEL, VOLUME, LCD contrast |
| External Control Terminals | BREATH CONTROL, FOOT SWITCH |
| Connecting Terminals | OUTPUT (output level -20dB / output impedance 10kOhms or less) PHONES (rated output level -16dB / output impedance 47 Ohms or less) FOOT SWITCH (PORTAMENTO ON/OFF, SUSTAIN ON/OFF), MIDI IN, MIDI OUT, MIDI THRU, CASSETTE (transmission speed 1,200 baud), BREATH CONTROL, DC IN |
| Power Supply | "C" size Batteries x 6 (battery life appox. 10 hours) |
| Dimensions (WxHxD) | mm 628 x 75 x 218 / in. (24.7" x 2.9" x 8.6") |
| Weight | 2.7kg (5.91lbs) |
| Standard Accessories | SUM-2 batteries x6, Cassette Cable, Strap pinecette, Explanation, Cassette Tape |
| Optional Accessories | FC4/FC5 Foot Switch, BC-1 Breath Controller, PA-1210 AC Adapter |
Programming Guide:
Programming the DX21,27,100 is a fairly simple operation. In this guide, you will find some general hints on what is important and what is not when trying to program.
The functions mentioned in this guide refer to buttons with the function written under it in TAN or above it in BLUE. Some functions of the DX21 are different than the DX27/100, if so, follow the text for your synth. I assume that you know how to access both the RAM voices and the ROM banks. I also assume you are somewhat familiar with the button layout.
STEP 1: Get going!
There are several methods that one can use to get going. First, make sure MEMORY PROTECT is off. If not, you can't store (or copy) an edited voice! You access the MEMORY PROTECT function by hitting the COMPARE/FUNCTION (dx21: CHARACTER/FUNCTION) button and then hitting the MEMORY PROTECT button. You will see something like:
| DX 27/100 | DX 21 |
| M protect: on | FUNCTION CONTROL Mem protect:ON |
If it's on, change it by using the Yes (+1) / No (-1) keys (in this case, hitting No). You can also use the slider to enter data. The slider and the Yes/No buttons in fact are the preferred way of entering data, and what you will be using throughout this guide to edit voices.
The only parts that can be edited and stored are the RAM voices, so it is best to do one of the following things:
- Initialize a voice. Hit the COMPARE/FUNCTION (dx21: CHARACTER/FUNCTION) button, then hit INIT VOICE. Hit Yes to initialize the voice. Write this initialized voice by using the STORE button, press the voice number that you want to STORE the sound in, and then go to it.
- Use a copy of a similar sounding voice. Go to the voice that you want to copy, and press STORE. Then, press the voice number that you want to copy to. Now go to that voice. It should be exactly the same.
STEP 2: The basic parameter, the algorithm parameter.
You now have your dull sounding ordinary voice. What now? Well, hit the COMPARE/EDIT button. This takes you into the heart of the editing area.
 Your synthesizer basically uses a process called FM synthesis to
generate its sound. The technical details are kind of unimportant, but
all you really need to know is that the synthesizer is really controlled
by 4 "operators". These four can either modulate each other or compliment
each other, in various ways. Ways, in
fact, described at the top of your keyboard (and the figure left, which shows ALG1). Look at it- see those boxes
numbered 1-8 with boxes numbered 1-4 connecting in various ways? These
are the 8 synthesizer algorithms. The boxes on the bottom act sound operators called "carriers". You
can have a voice without the operators above the the carriers but it will sound rather
plain. Operators above the carrier are modulators. Without the base carrier operators no voice will be produced. The fourth operator can be self fed in a feedback loop, it can modulate itself.
Each algorithm has a unique sound. For instance:
Your synthesizer basically uses a process called FM synthesis to
generate its sound. The technical details are kind of unimportant, but
all you really need to know is that the synthesizer is really controlled
by 4 "operators". These four can either modulate each other or compliment
each other, in various ways. Ways, in
fact, described at the top of your keyboard (and the figure left, which shows ALG1). Look at it- see those boxes
numbered 1-8 with boxes numbered 1-4 connecting in various ways? These
are the 8 synthesizer algorithms. The boxes on the bottom act sound operators called "carriers". You
can have a voice without the operators above the the carriers but it will sound rather
plain. Operators above the carrier are modulators. Without the base carrier operators no voice will be produced. The fourth operator can be self fed in a feedback loop, it can modulate itself.
Each algorithm has a unique sound. For instance:
- Algorithms 1-3 are in general the sounds used for the complex instruments- brasses, strings, and synths. I haven't found much difference between them except in tonal quality. 3 in particular is good for brasses and special FX.
- Algorithm 4 is similar, but of the first four algorithms, this one tends to be quite different, because of its structure. I often program a voice and switch to algorithm 4 just because it can be quite different. A lot of good special effects, for instance.
- Algorithm 5 is a dual algorithm. It gives you two distinctly different sounds, so you can do (with difficulty) piano/string and piano/organ combos, and whatnot.
- Algorithms 6-7 tend to be good for bell washes and good organ sounds.
- Algorithm 8 is a quiet algorithm. REAL quiet organs, if that, are about the only things possible (and simple tone rings).
| DX 27/100 | DX 21 |
| ALG: 1 | ALG 1 1111 ALGORITHM SELECT |
If not, hit the ALGORITHM button to get to the right window. You can change it with the +/- keys, or the slider. Don't really have an idea of what you want? Guess. I often change the algorithm AFTER I program the voice.
STEP 3: Programming the general parameters.
Alright, now let's shape a little more of the instrument. Here are some more parameters. All of the parameters are accessible by hitting the button with the function written above it in blue (dx21: sometimes under the button in orange: first hit the CHARACTER/FUNCTION button).
FEEDBACK
You noticed the little loop on operator 4 shown in each algorithm on the keyboard? That's the feedback loop. This value determines how much operator 4 will have an affect on your voice. A feedback value of 7, combined with some good op4 values, can produce some stunningly brilliant and crisp voices. A feedback value of 0, on the other hand, produces more mellow sounds. It depends on what you are looking for. Most voices either use 0, 1, 6, or 7 for some reason. This is a good one to play around with later.
LFO wave
Not important except for the modulation wheel. You can create some nifty effects with the mod wheel, so sometimes you don't want that standard triangle mod. Try using the S/H value, for instance. Or square combined with some effects below. There are four values to try: triangle, square, saw tooth and sample & hold (S/H).
LFO Speed
The speed in which it vibrates. Nothing important here, except FX wise, speeds of 1 are interesting, as well as 99 speeds (can produce a "snow effect" with some mod shapes).
LFO Delay
How long it takes before the modulation gets going. No big deal.
PMD
PMD or Pulse Modulation Depth is useless for most voices, I think. All it does is apply the amount of vibrato/FX you set to the actual voice. In some voices, you want a little vibrato, so set the PMD up a bit. It's independent of the mod wheel. See MODULATION SENSITIVITY - PITCH.
AMD
AMD or Amplitude Modulation Depth: Same deal here, if you want some of the amplitude modulation in the actual voice, use this parameter. It's also independent of the mod wheel. Great for effects- see MODULATION SENSITIVITY - AMPLITUDE.
MODULATION SENSITIVITY - PITCH
This determines the amount of vibrato that you will hear. Normally, keep this setting in the high range, unless you like the vibrato as very soft. See Step 5, WHEEL RANGE - PITCH for more info on how to control the pitch modulation.
MODULATION SENSITIVITY - AMPLITUDE
You can REALLY create some wacky effects with the right settings. What this does is do some funky effects (wahish like effects and tremolo effects) on the modulation. This can definitely be used to your advantage, especially when you combine it with some AMD and PMD settings (or simply use the vibrato wheel). Experimentation is about the best thing to suggest. I have often combined this voice setting with AMD and gotten funky results on both voice and mod wheel effects. The settings are as follows:
| DX 27/100 | DX 21 |
| 3 1111 | ALG 1 AME 1111 A MOD SENS. = 3 |
Where the '3' means the over all amount for all operators. Change it with the +/- buttons or the data entry sliders. '1111' shows on which operators the AME is effected. The first 1 stands for op1, the second for op2, and so on. '1' means AME is effected on the corresponding operator, '0' means no effect on that operator. You can change these by hitting a bank button on the DX27/100 (A is op1, B is op2 ...) or hitting buttons 1-4 on the DX21.
By the way, a little hint here: In normal editing operation, hitting the bank buttons (or buttons 1-4 on the DX21) will temporarily turn off the particular "operator" you select. So you can hear the impact of each operator on the voice. Also, see step 5, WHEEL RANGE - AMPLITUDE. This effect is useless without that.
TRANSPOSE:DX27/100 | TRANSPOSE:DX2:
Kind of obvious. Range is from C1-C5. Determines the base key of the voice. On the DX21 you can reach this by first hitting CHARACTER/FUNCTION and then TRANSPOSE.
CHORUS:DX27S | CHORUS:DX21 | (Chorus only available on DX21/27S)
STEP 4: The operator parameters.
The remaining programming parameters in edit mode access individual operator parameters. It is important to know some of the useful commands for editing these parameters:
- Pressing the PB MODE button (on the far left) switches the operator that you are working on. If you are working on OP1 (operator 1, or what have you), pressing the PB MODE button will switch the operator you are working on to OP2. Subsequent presses will cycle to OP3, OP4, and back to OP1.
- Pressing the STORE/EG COPY buttons allows you to copy operator settings from one to another. In other words, say you like the parameters you've programmed for operator 1, and want that to also be in operator 3 as well. Simply press the STORE (EG COPY) button, hit the particular bank corresponding to the operator that you want to copy the settings to (dx21: buttons 1-4). That's it!
- Pressing the Bank buttons (dx21: buttons 1-4) themselves toggles whether that operator is playing or not. You will notice in all of the settings dealing with operators, there will be four numbers marked 1111. These correspond to operators 1, 2, 3 and 4 (left to right), showing whether that operator is currently playing. You can toggle the status with the bank switches (dx21: buttons 1-4). 0 is off, 1 is on. Note that this is only a TEMPORARY measure. If you want to set that particular operator off all the time, go to OPERATOR OUT LEVEL, select the operator, and set the volume to 0. You also see a capital E or a lower case e, a capital E meaning the voice has been unedited, a lower case e meaning it has been edited.
With that, here's a description of some more parameters:
EG BIAS
This only has to do with people who use a breath control. The higher the number, the greater the depth/modulation.
KEY VELOCITY
This effect doesn't help if you only have the DX21/DX27/DX100 keyboard, but if you control the keyboard with another MIDI device with velocity sensitivity, it can be somewhat useful. With other keyboards controlling the MIDI, if you set key velocity on, playing harder will make the notes sound harder and playing softer will make the notes sound softer. This can lead to some interesting effects:
- You can apply key velocity to the base operators and get an effect like you were using an actual velocity sensitive keyboard (er, somewhat).
- You can apply key velocity to the modulators and get neat pulse-pad type effects, such as pressing harder will cause more feedback thus creating a sharper sound to occur.
OSCILLATOR - FREQ RATIO
This is a fairly important one, as it determines how your voice will sound. You select frequencies to play, which determines the tone of the particular operator. The most useful ones are:
- Settings of 1.0, 0.5, 2.0, and occasionally 4.0. 1.0 is the generic tone, 0.5 is one octave down, 2.0 is one octave up, etc. Your basic tones. But important is to vary some of the tones for rich effects. Combine a 1.0 base tone with a 0.5 modulator tone, for example. You get some nice results.
- The fractional frequencies. Not as useful, but these can create some STUNNING bell tones and are basically the secret to why the Yamaha FM generators can do such great bells. Can do nice bell-like harmonics and effects with the fractional things.
OSCILLATOR - DETUNE
You can add some nice variety to your voices by playing with the detune settings. If you vary the detune in each operator, you can get a nice tone effect similar to phasing or chorus that adds definition and depth.
ENVELOPE GENERATOR
 This is like most envelopes in keyboards,
though not to the same extent as some of the complex envelopes of today. On the top-left of your keyboard
a figure shows the envelope generator and it's parameters. Also the figire on the right of this text shows it.
This is like most envelopes in keyboards,
though not to the same extent as some of the complex envelopes of today. On the top-left of your keyboard
a figure shows the envelope generator and it's parameters. Also the figire on the right of this text shows it.
- AR - Attack rate. How fast the tone starts up. 1-5 can be used for slow sweeps, and 31 is used for fast, instantaneous tones (organs). Use 12-15 for sounds like strings, pianos, etc.
- D1R - Decay 1 rate. Often, this decay should be somewhat sharp, but it doesn't have to be. Pianos tend to have a decay of 8, organs a decay of 12, and brass a decay of 16.
- D1L - Decay 1 level. What level the first decay at, with 15 being the maximum. For fun and sheer stupidity, set it quite low. Most instruments actually have this in the 12-15 range (with 15 meaning the first decay doesn't matter too much).
- D2R - Decay 2 rate. The second decay when you are holding the note, and the one you should be most concerned about (unless you set the decay 1 level somewhat low). Set this in the 0-3 range for the most point. You can get some nice blip sounds with 15-30 decay rates, however.
- RR - Release rate. How the note decays after release. You almost never want to set it to 0. Slow decays happen at 1-3, and higher decays occur with 4-7 and more. This one you really have to experiment with.
Remember, you can set the envelope curve (as this thing is known) differently for each operator! That can create some nice effects- especially if the attack rate and delay for the modulator ops are different then the base operator. Remember, though, the base operator controls the overall tone of the voice- in other words, setting the modulators to a faster rate then the base operator won't have a very significant effect.
OPERATOR OUT LEVEL
Fancy terminology for "Volume". 0 is the lowest, 99 is the highest. Each operator can have different settings, but remember the base operator (the one on the bottom of that little chart on your sync) controls a lot.
KEYBOARD SCALING - RATE
This basically means that the higher notes get shorter, quicker envelopes (attack and release times) then the lower notes. Useful only for "realism" or some effects. The range is from 0-3, with 0 meaning no rate scaling takes place, and 3 being the highest. For each operator.
KEYBOARD SCALING - LEVEL
This basically means that the higher notes have less volume then the lower notes (for each operator- in other words, you can level scale a modulator and not level scale the base tone). Useful, again, only for "realism". The range is from 0-99, with 0 meaning level scaling is off. 99 is too much, usually- if you want some realism, try playing with this and adjusting accordingly.
PITCH ENVELOPE GENERATOR DX21 only!
This is a big differences between the DX27/100 and the DX21. The DX21 has not only a normal envelope generator (for amplitude), but also a pitch envelope generator. You can use this to generate pitch-sweeps, or voices that start sounding out of tune and over time they come back in tune. it adds realism, effects etc...
- PR1 - Pitch 1 rate. How fast the pitch reaches PL1. From 0-99. Set to 0 the pitch never reaches PL1, 99 the pitch immediately reaches PL1 (default).
- PL1 - Pitch 1 level. The pitch level. From 0-99, 50 is the default value which is 'in tune'.
- PR2 - Pitch 2 rate.
- PL2 - Pitch 2 level.
- PR3 - Pitch 3 rate.
- PL3 - Pitch 3 level. Set this to 50 if you want your voice to end on the normal pitch. Set this to 0 or 99 to sweep it down or up 'till you can't hear it.
There's more settings even yet! Some settings are available through the control panel, that are unique to each voice. To access them, merely press the button marked FUNCTION. Then, merely access each parameter by pressing the button with the function in orange under it. The control panel settings are as follows:
POLY/MONO
Normally, voices are 8 note polyphonic. You can, however, make the voices monophonic (mostly useful for leads).
PITCH BEND RANGE
How much the pitch wheel goes up or down in pitch. 0 means the pitch bender is off, 12 means the pitch bend is an octave. (As you could guess, each number is 1 half-note on the keyboard, or one semitone. A setting of 1, for instance, allows a bend from C to C#.) By the way, did you know you can reverse directions of the pitch bend wheel (on the DX27) by holding down the PB Mode button while turning on the keyboard? And that you can change the intro screen of the DX27 by holding down the key shift button while turning on the DX27 (and editing like discussed in VOICE NAME?).
PORTAMENTO - MODE
Unless you have set the voice to Mono mode, there is no point to this setting. However, if you have the voice in mono mode, and want some portamento, there are two options:
- Full Time Portamento: Portamento occurs whenever a new note is played. Default (the only setting for polyphonic).
- Fingered Portamento: Portamento occurs only if the previous played note is held while the next note is played. Creates some INTERESTING lead possibilities.
0 is off, and the rest determines the speed of the portamento. At settings such as 10, the portamento is slow and draggy. At settings such as 99, the portamento zips and can create a laser effect.
PORTAMENTO - FOOT SW DX21 only!
Sets the Portamento foot switch on or off. If On you can set portamento on/off with the footswitch.
FOOT SWITCH DX27/100 only!
This determines what the foot switch does. Normally, it is a sustain pedal, but in certain cases (leads), you may want to switch it to portamento. In portamento, as long as PORTAMENTO MODE and TIME are set appropriately, the foot switch determines when the portamento occurs. If you press the foot switch, portamento occurs, elsewise the portamento is off. Great for lead instruments that don't need sustain.
Pressing FOOT SWITCH again on DX27S's will access the foot volume pedal amount, which is adjustable from 0 to 99. At 0, the foot volume pedal has no effect; at 99, the foot volume pedal has maximum effect.
FOOT CONTROL - VOLUME DX21 only!
This will access the foot volume pedal amount, which is adjustable from 0 to 99. At 0, the foot volume pedal has no effect; at 99, the foot volume pedal has maximum effect.
FOOT CONTROL - SUSTAIN DX21 only!
You can set this to ON of OFF, ON if you use a sustain foot switch and the voice has to react on it.
WHEEL RANGE - PITCH
This one can be important for effects. Combined with the Pitch Modulation Sensitivity, it can produce some stunning results. The setting is from 0 to 99. 0 says no pitch modulation takes place; 99 says maximum pitch modulation takes place. Combine it with the PMS setting to produce deeper wave.
WHEEL RANGE - AMPLITUDE
Combine this with the AMD setting and others for some real wacky effects. Normally this setting is at 0, so in order for the amplitude modulation stuff described in step 3 to be in any way effective, this must be turned higher. Like 99 (which really whacks the modulation out). Great for FX.
BREATH CONTROL
The breath control stuff (Pitch, Amplitude, Pitch Bias and EG Bias) are only important if you have a breath control and want to use it.
VOICE NAME
DX27/100: Use the slider and the +/- buttons to change each letter. Hit the VOICE NAME again to advances the cursor from left to right.
DX21: Hold down CHARACTER/FUNCTION and press the button with the desired character and so on. Pressing VOICE NAME moves the cursor to the left.
STEP 6: Saving the voice. Conclusion.
Now, you can save the voice. Select play mode: INTERNAL/PLAY on the DX27/100 and SINGLE on the DX21, Hold STORE and press one of the corresponding # BUTTONS where the newly edited voice will be stored.
You're done! Wasn't that fun? At any rate, you now have a nice custom voice, hopefully. Enjoy playing around with your voices!
More information about programming and FM-synthesis as well as other features can be found in the owners manual.
This programming guide was originally written by Chad Gould titled:
'A brief guide to programming your DX-27/DX-100'.
It has further been edited and modified by Jan den Besten and NuxMicroMedia.